
How to set up Linux, Apache, MySQL, PHP (LAMP) Stack on Ubuntu 22.04
A LAMP stack is a set of open-source tools used to run dynamic websites and web apps. It includes Linux as the operating system, Apache as the web server, MySQL for storing data, and PHP for processing content.
Set up a LAMP stack on Ubuntu:
- Install Apache & Configure Firewall – Get your web server up and running while ensuring it’s accessible.
- Install MySQL – Set up the database to store your website’s data.
- Install PHP – Add PHP to process dynamic content.
- Set Up a Virtual Host – Organize multiple websites on one server.
- Test PHP Processing – Make sure PHP is working correctly.
- Check Database Connection – Verify that PHP can connect to MySQL.
Installing Apache and Updating the Firewall
Apache is one of the most popular web servers out there. It’s well-documented, has a strong user community, and has been around for a long time—making it a solid choice for hosting websites.
First, update your package manager cache. If it’s your first time using sudo in this session, you’ll need to enter your password to confirm you have the right permissions to manage system packages with apt.
# apt update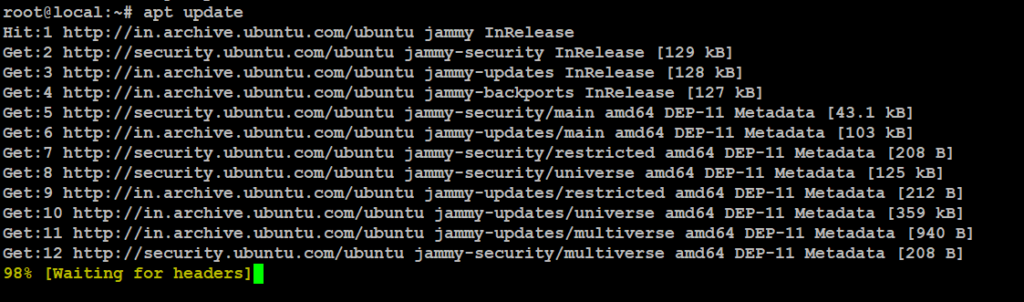
Install Apache
# apt install apache2
After installing, you’ll need to tweak your firewall settings to allow HTTP traffic. Ubuntu uses Uncomplicated Firewall (UFW) by default, which comes with various application profiles. To see the available ones, run:
# ufw app list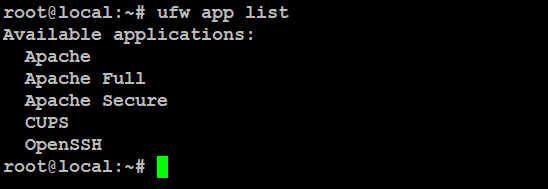
Here’s what each of these profiles does:
- Apache: Opens only port 80 for regular, unencrypted web traffic.
- Apache Full: Opens both port 80 (unencrypted) and port 443 (encrypted with TLS/SSL).
- Apache Secure: Opens only port 443 for secure, encrypted traffic.
Since this is a fresh Apache setup and you haven’t configured a TLS/SSL certificate yet, it’s best to allow only port 80 for now.
To do this, use the Apache profile.
# ufw allow in "Apache"
Verify the change
# ufw status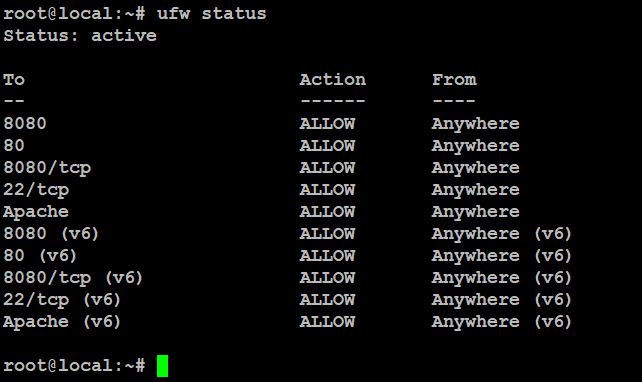
Traffic on port 80 is now open through the firewall.
To double-check that everything is working, simply open your web browser and visit your server’s public IP address. If you’re not sure what your public IP is, check the note in the next section for guidance.
# http://your_server_ip
# http://192.168.1.50/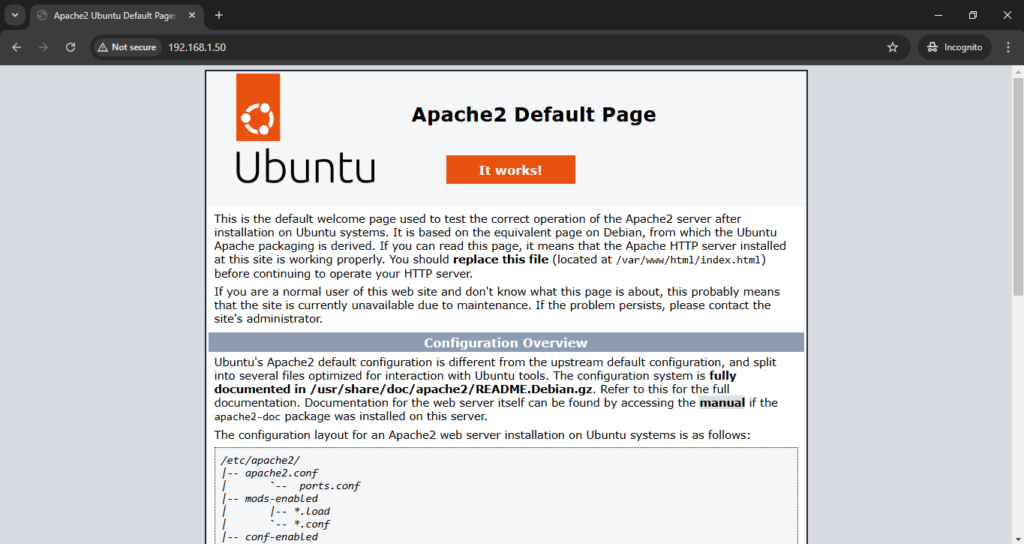
Find your Server’s Public IP Address
If you’re unsure about your server’s public IP address, there are a few simple ways to find it. This is usually the same address you use to connect via SSH.
One quick method is using the iproute2 tools right from the command line.
# ip addr show ens33 | grep inet | awk '{ print $2; }' | sed 's/\/.*$//'
You can also use the curl command to check how your server appears from the outside. Simply ask an external server to reveal your public IP address.
# curl http://local.bitscentric.com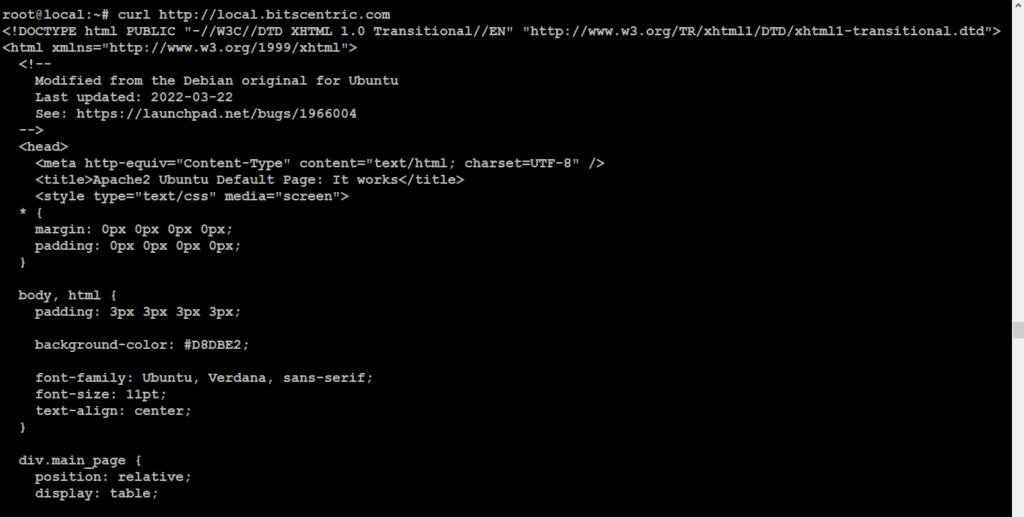
Installing MySQL
Now that your web server is up and running, the next step is to set up a database to store and manage your site’s data. MySQL is a popular choice, especially for PHP-based websites.
# apt install mysql-server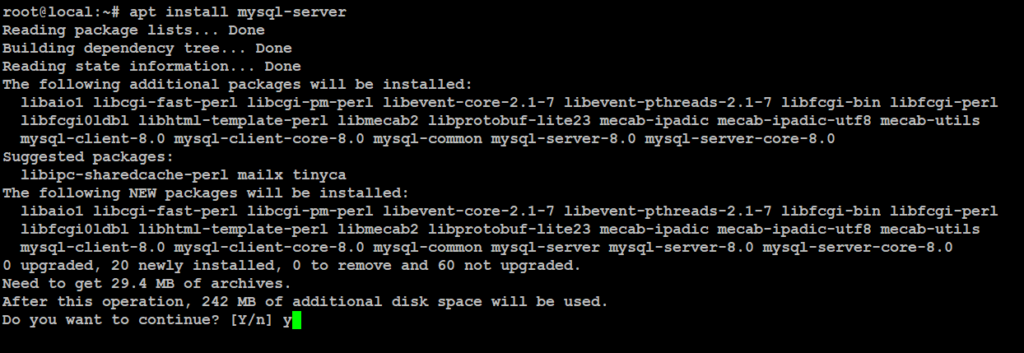
When prompted, confirm installation by typing Y, and then ENTER.
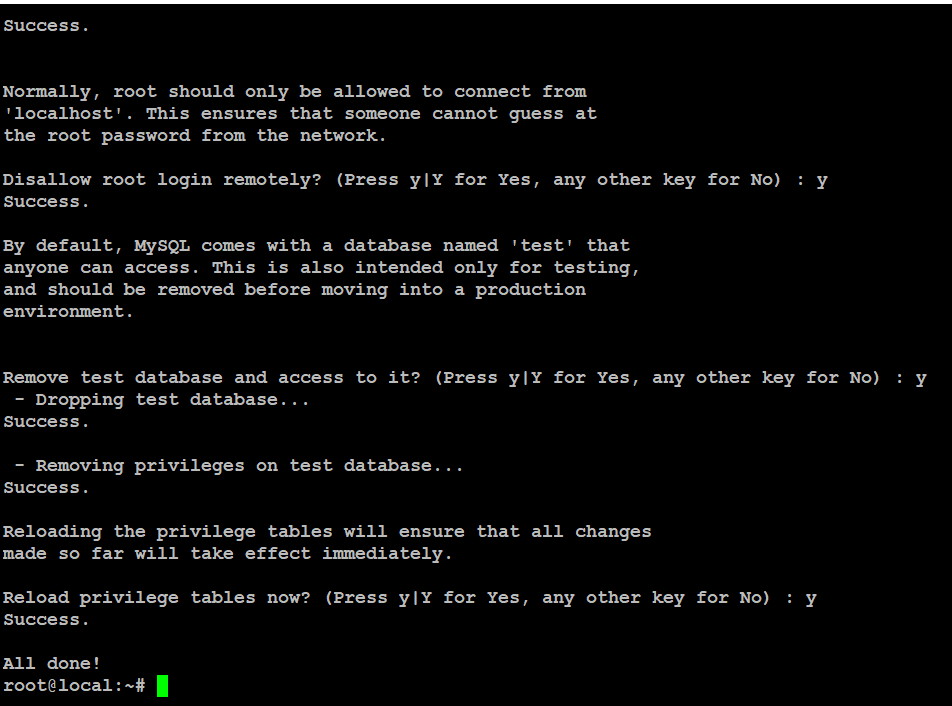
After installing MySQL, it’s a good idea to run a built-in security script. This helps remove weak default settings and makes your database more secure.
Before you start using MySQL to manage your data, it’s a good idea to run the mysql_secure_installation script to improve security. However, to avoid getting stuck in a loop, you’ll first need to change how the MySQL root user authenticates.
Start the interactive script
# mysql_secure_installationJust press Y and hit Enter for each prompt. This will clean up anonymous users, remove the test database, block remote root logins, and apply the changes immediately.
Now, login the mysql databases
# mysql -u root -p
MySQL is now set up and secured. Next, let’s install PHP—the last piece of the LAMP stack.
Installing PHP
You have Apache to serve your content and MySQL to manage your data. PHP handles the dynamic content, making your site interactive. To connect PHP with MySQL, you’ll need the php-mysql module. Also, install libapache2-mod-php so Apache can process PHP files. The core PHP packages will be installed automatically.
# apt install php libapache2-mod-php php-mysql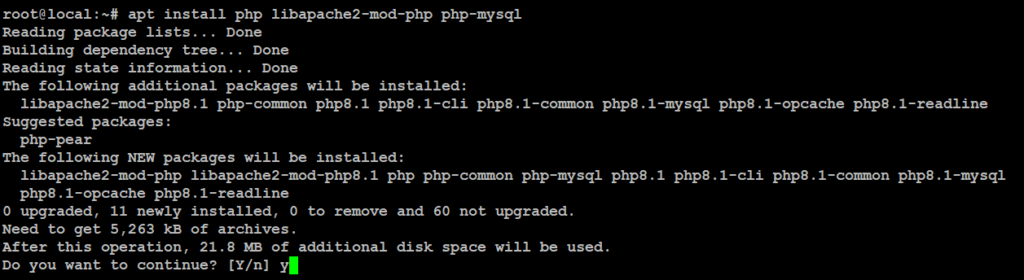
After installing, check your PHP version with this command.
# php -v
Changing Apache’s Directory Index (Optional)
Sometimes, you may want to change how Apache serves files when someone requests a directory. By default, Apache looks for an index.html file first. However, if your application uses PHP, you might want it to prioritize index.php instead. Otherwise, if both files exist, index.html will always load first, even if you intended to use PHP.
To fix this, you’ll need to update Apache’s configuration by editing the dir.conf file.
Move the PHP index file to the first position right after the DirectoryIndex directive.
# vim /etc/apache2/mods-enabled/dir.conf
<IfModule mod_dir.c>
        DirectoryIndex index.php index.html index.cgi index.pl index.xhtml index.htm
</IfModule>
After this, restart the Apache web server in order for your changes to be recognized.
# systemctl restart apache2.service
# systemctl status apache2.service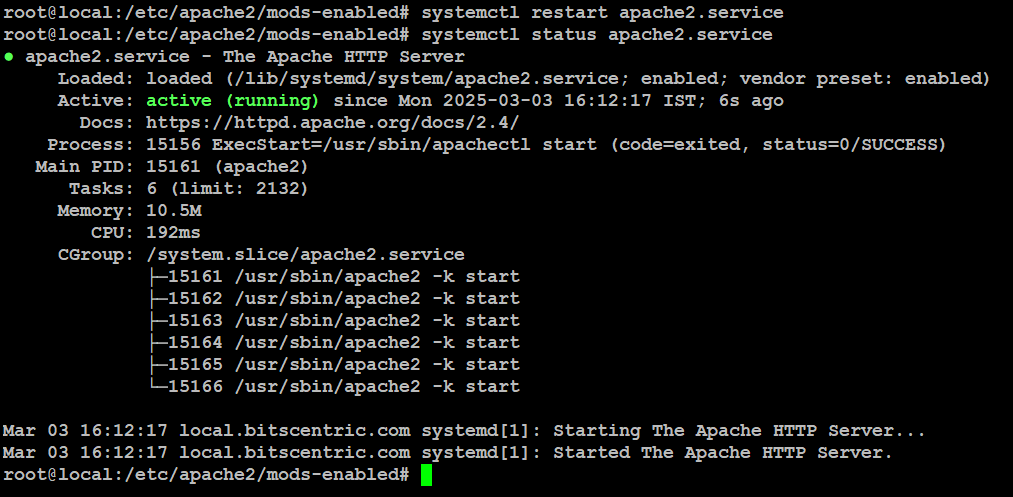
If you decided that php-cli is something that you need.
# apt install php-cli
Your LAMP stack is now installed and ready to go! But before diving in, it’s a good idea to set up an Apache virtual host. This will help organize your server’s configuration and keep your website’s files neatly in place.
Setting Up a Virtual Host for Your Website
By default, Apache on Ubuntu comes with a virtual host that serves files from the /var/www/html directory. This setup works fine for a single website, but managing multiple sites can get messy if everything is placed in the same directory. Instead of modifying /var/www/html, we’ll create a dedicated directory structure within /var/www for your site (your_domain). This way, /var/www/html remains the default directory, serving content only when no other site configurations match a request.
# mkdir /var/www/local.bitscentric.com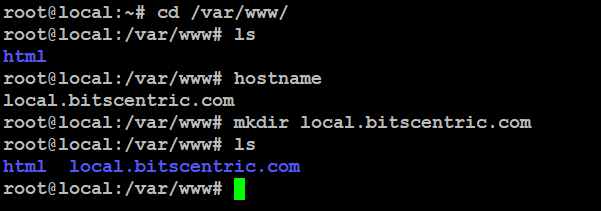
Next, make yourself the owner of the directory by using $USER, which represents your current system user.
# chown -R $USER:$USER /var/www/local.bitscentric.com/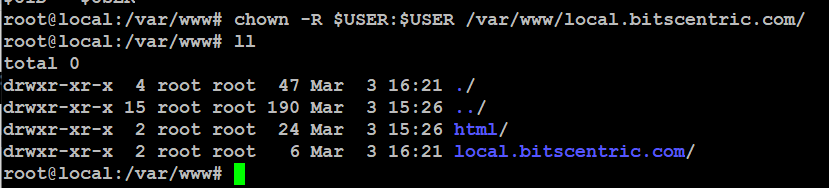
Open a new configuration file in Apache’s sites-available directory using your favorite command-line editor.
# vim /etc/apache2/sites-available/local.bitscentric.conf

<VirtualHost *:80>
    ServerName local.bitscentric.com
    ServerAlias www.local.bitscentric.com
    ServerAdmin admin@local.bitscentric.com
    DocumentRoot /var/www/local.bitscentric.com
    ErrorLog ${APACHE_LOG_DIR}/local.bitscentric.com_error.log
    CustomLog ${APACHE_LOG_DIR}/local.bitscentric.com_access.log combined
</VirtualHost>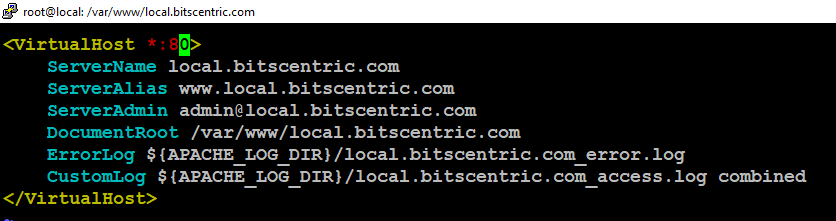
Now, use a2ensite to enable the new virtual host.
# sudo a2ensite local.bitscentric.conf
You may want to disable Apache’s default website, especially if you’re not using a custom domain. Otherwise, its default settings could override your virtual host. To turn it off, simply run:
# a2dissite 000-default
To check for syntax errors in your configuration file, use this command:
# apache2ctl configtest
Finally, reload Apache
# systemctl reload apache2
# systemctl status apache2.service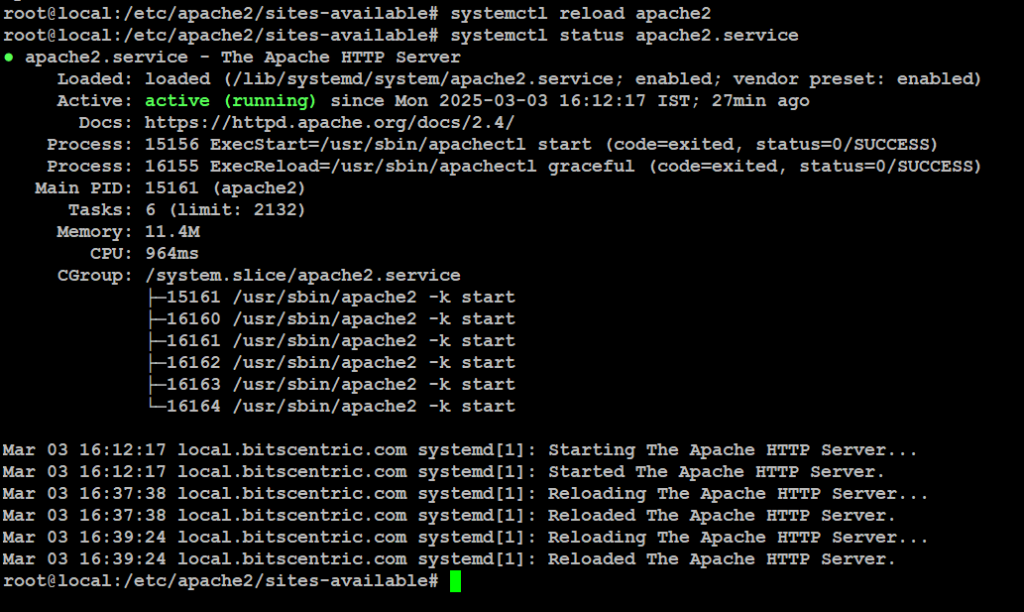
Your new website is live, but the web root (/var/www/your_domain) is still empty. To check if your virtual host is working properly, create an index.html file in that location.
# vim /var/www/local.bitscentric.com/index.html

<html>
  <head>
    <title>local.bitscentric.com</title>
  </head>
  <body>
    <h1>Hello World!</h1>

    <p>This is the landing page of <strong>local.bitscentric.com</strong>.</p>
  </body>
</html>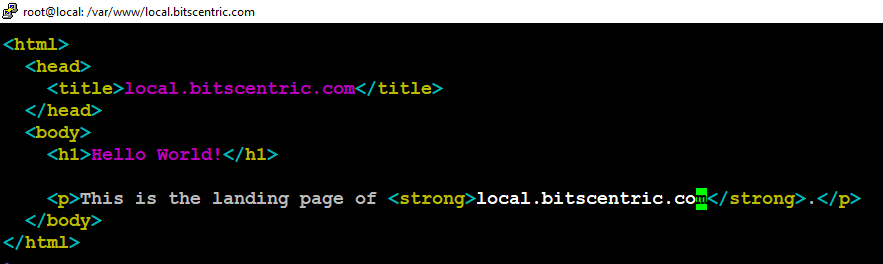
Save the file, close it, and then open your browser to visit your server’s domain or IP address.
# http://server_domain_or_IP
# http://192.168.1.50/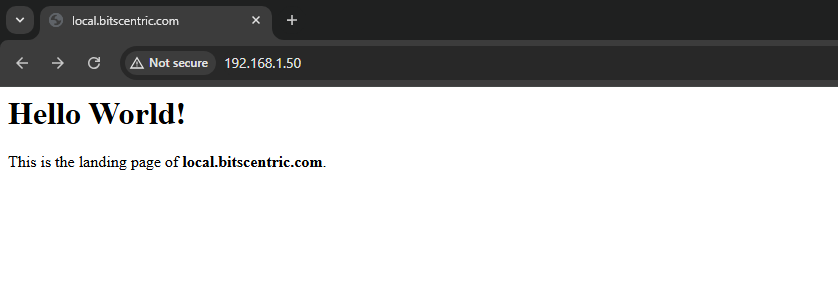
Testing PHP Processing on your Web Server
Now that you’ve set up a custom location for your website’s files, let’s test if Apache can process PHP correctly.
Create a new file called info.php inside your custom web root folder. This will help confirm that everything is working as expected.
# vim /var/www/local.bitscentric.com/info.php
<?php
phpinfo();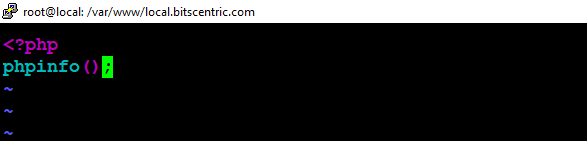
To test this script, open your web browser and enter your server’s domain name or IP address, followed by “info.php”.
# http://server_domain_or_IP/info.php
# http://192.168.1.50/info.php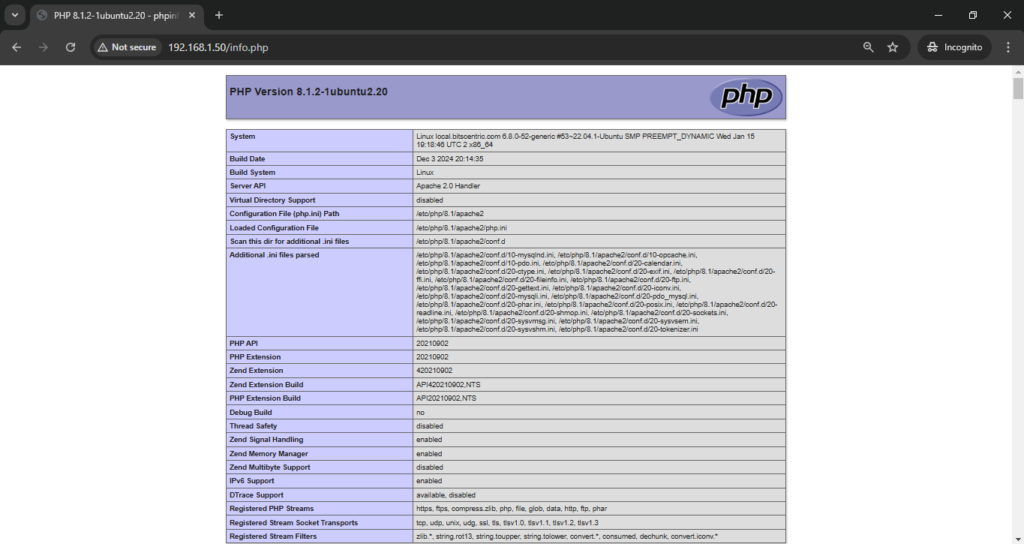
Testing Database Connection from PHP (Optional)
To check if PHP can connect to MySQL and run queries, you can create a simple test setup. Start by creating a database called example_database and a user named example_user (or choose your own names). Then, add some test data and use a PHP script to retrieve it.
mysql> create database bitscentric;
Query OK, 1 row affected (0.01 sec)

mysql> CREATE USER 'bitscentric'@'%' IDENTIFIED BY 'Ak123!@#';
Query OK, 0 rows affected (0.05 sec)

mysql> GRANT ALL ON bitscentric.* TO 'bitscentric'@'%';
Query OK, 0 rows affected (0.01 sec)

mysql> exit
Bye
root@local:~#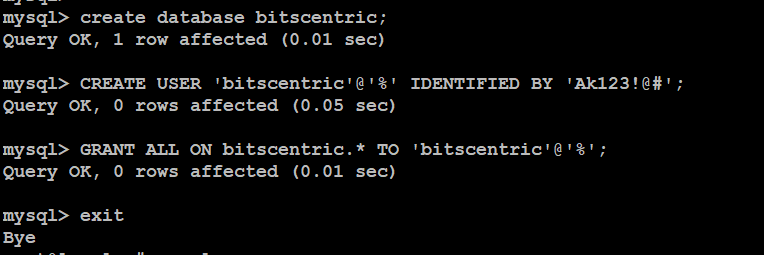
Next, create a test table. From the MySQL console.
# mysql> CREATE TABLE bitscentric.id(
    -> item_id INT AUTO_INCREMENT,
    -> content VARCHAR(255),
    -> PRIMARY KEY(item_id)
    -> );
Query OK, 0 rows affected (0.04 sec)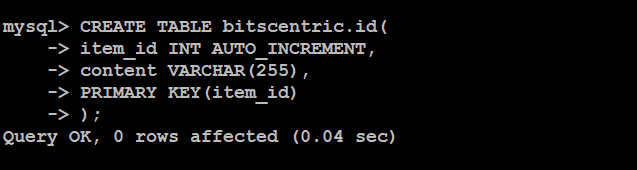
Add some data to the test table by running the following command a few times with different values.
# mysql> INSERT INTO bitscentric.id (content) VALUES ("My first important item");
Query OK, 1 row affected (0.00 sec)
To confirm that the data was successfully saved to your table.
# mysql> select * from bitscentric.id;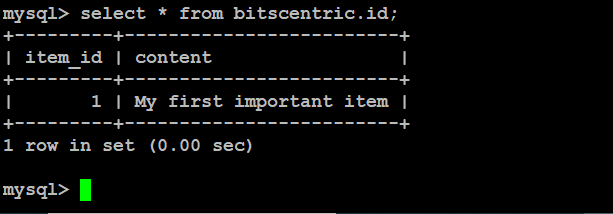
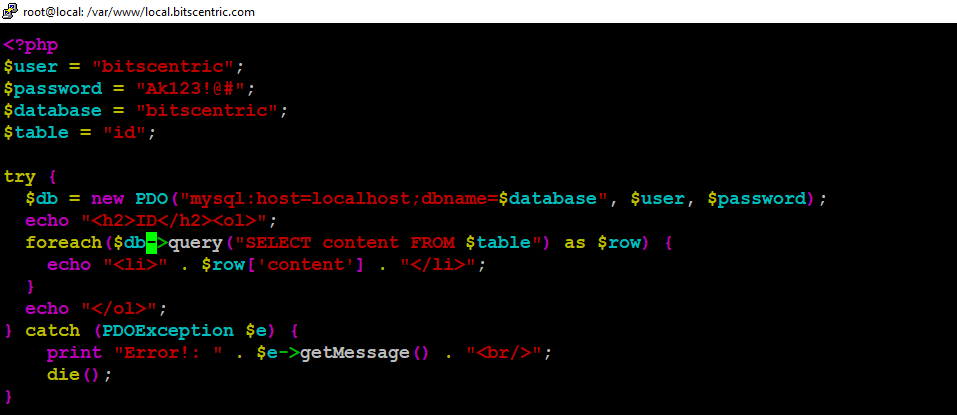
Create a PHP file in your web root directory using your favorite editor. This script will connect to MySQL and fetch your data.
# vim /var/www/local.bitscentric.com/id.php
<?php
$user = "bitscentric";
$password = "Ak123!@#";
$database = "bitscentric";
$table = "id";

try {
  $db = new PDO("mysql:host=localhost;dbname=$database", $user, $password);
  echo "<h2>ID</h2><ol>";
  foreach($db->query("SELECT content FROM $table") as $row) {
    echo "<li>" . $row['content'] . "</li>";
  }
  echo "</ol>";
} catch (PDOException $e) {
    print "Error!: " . $e->getMessage() . "<br/>";
    die();
}
You can now view this page in your browser by visiting your website’s domain or public IP address.
# http://your_domain_or_IP/id.php
# http://192.168.1.50/id.php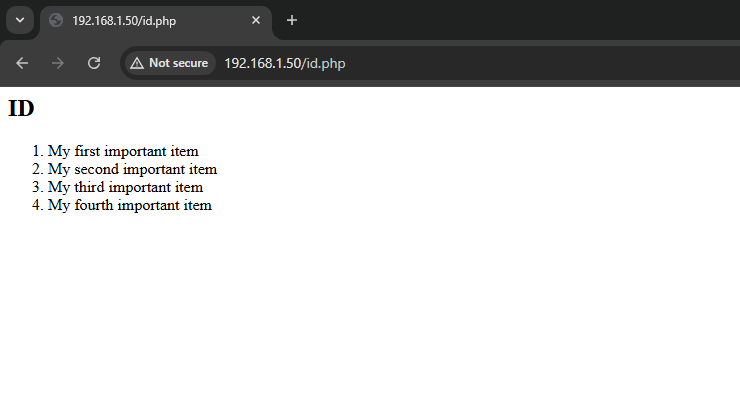
Your PHP setup is all set to connect and work with MySQL.