
How to Set a Static IP on Ubuntu
A static IP is important for Linux servers since it stays the same after a reboot. This is crucial for servers like mail, web, and file servers.
On modern Ubuntu Server, Netplan is used for network configuration. You’ll find its settings in /etc/netplan/, where the configuration files are written in YAML and have a .yaml extension.

First, verify the current configuration.
Before setting up Netplan, we first need to find the network interface name. To check the available network interfaces
# ip addr or ifconfig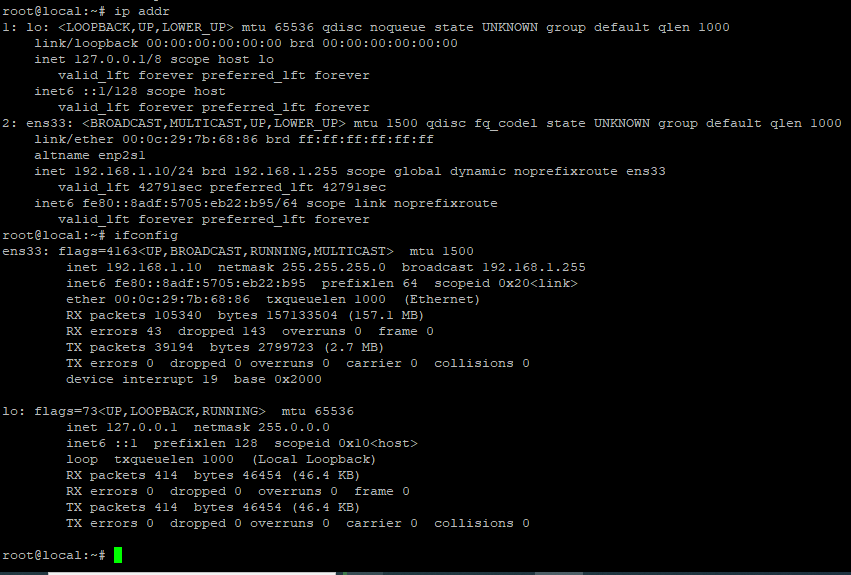
The active interface here is ens33. It’s always a good idea to note down the current IP details before making any changes, just in case you need to roll back.
To set a static IP instead of DHCP, open the Netplan config file with vim or nano and add this:
# vim /etc/netplan/01-network-manager-all.yaml

# Let NetworkManager manage all devices on this system
network:
  version: 2
  renderer: NetworkManager
  ethernets:
   ens33:
     dhcp4: no
     addresses: [192.168.1.50/24]
     gateway4: 192.168.1.1
     nameservers:
         addresses: [192.168.1.1,8.8.8.8]
To try the configuration before applying
# netplan try
# netplan apply
In case you run into some issues
# netplan --debug applyTo check the ip address
# ifconfig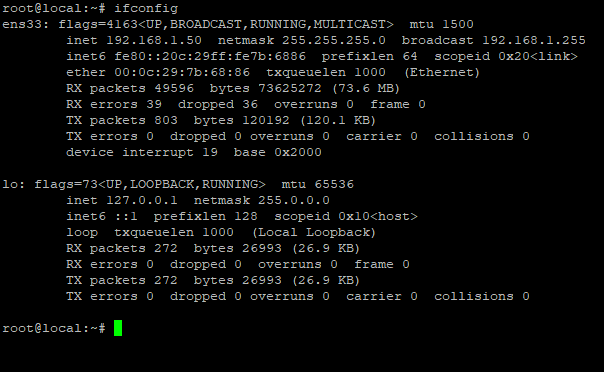
View the ip address on interface,
# ip addr show ens33
# ip route show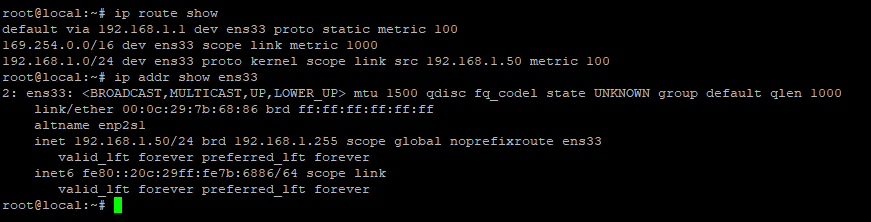
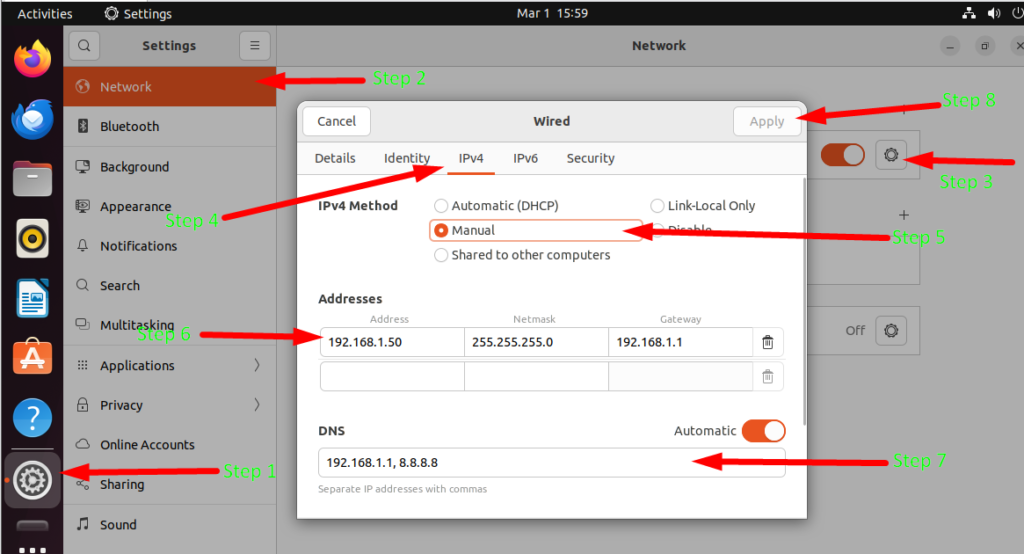
How to Set a Static IP Using the GUI
Setting a static IP on Ubuntu Desktop is simple:
- Open Settings and go to the Network or Wi-Fi tab.
- Click the gear icon next to your connection.
- In the IPv4 tab, choose Manual and enter your IP address, Netmask, and Gateway.
- Click Apply, and you’re done!
Great! The output confirms that the static IP and route are set up successfully.