How to Install Samba on RHEL
File sharing is a vital aspect of server administration, enabling seamless resource access across networks and empowering users to complete their tasks efficiently. Among the most widely used tools for file sharing is Samba.
Samba, a free and stable software solution, re-implements the SMB (Server Message Block) protocol. This versatile application facilitates the sharing of files and print services across networks. By installing Samba on a central Linux server, organizations can ensure that shared resources are easily accessible, regardless of whether the users are on Linux or Windows systems.
Samba is an open-source, fast, and secure file-sharing system that works across many different operating systems. It uses the SMB/CIFS protocol to let devices like Linux, Windows, DOS, OS/2, and more easily share files and printers with each other.
Install Samba4 in RHEL
# yum install samba samba-client samba-common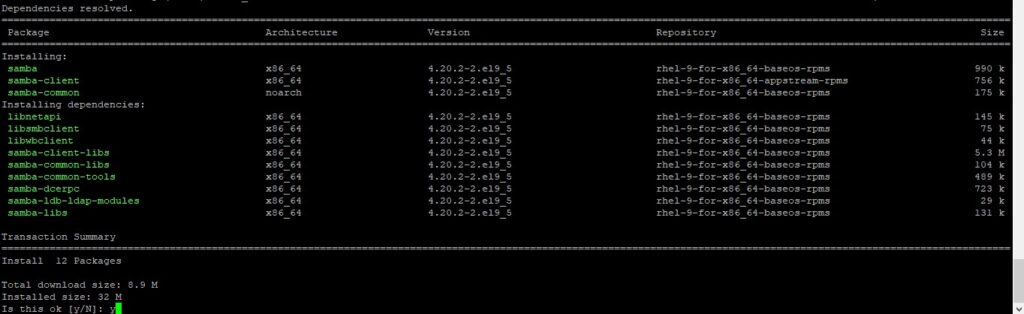
Once the installation is complete, start the Sambe service and enable it.
# systemctl start smb
# systemctl enable smb
# systemctl status smb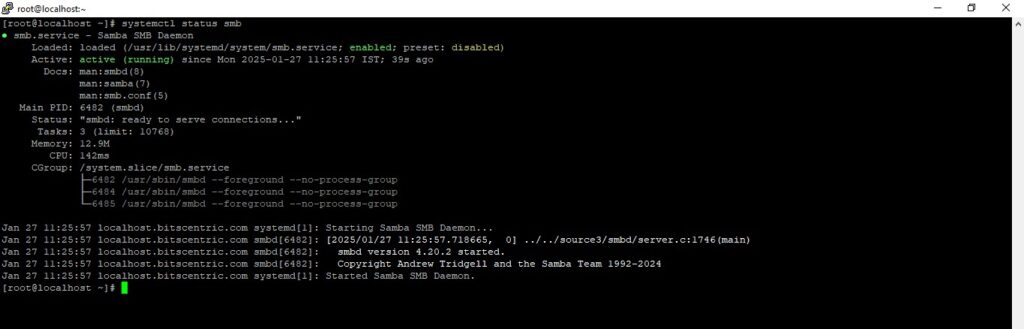
If you have a firewall set up, you’ll need to add the Samba service to your firewall settings. This ensures that users can access the shared files and directories on your system without any issues.
# firewall-cmd --permanent --add-service=samba
# firewall-cmd --reload
Configure Samba4 on RHEL
To configure Samba for file sharing, you need to create a backup copy of default samba configuration file
# cp /etc/samba/smb.conf /etc/samba/smb.conf-backupSetting Up Samba4 Anonymous File Sharing on RHEL
The first step is to create a shared directory on the server where files will be stored, then set the correct permissions for that directory.
# mkdir -p /srv/samba/anonymous
# chmod -R 0777 /srv/samba/anonymous/
# chown -R nobody:nobody /srv/samba/anonymous/
Now open the samba configuration file and configure the anonymous unsecured file sharing on a shared directory. Modify the following global parameters and add a section for the Anonymous share.
# vim /etc/samba/smb.conf

[global]
        workgroup = WORKGROUP
        server string = Samba Server %v
        security = user
        netbios = RHEL-9
        passdb backend = tdbsam
        printing = cups
        printcap name = cups
        load printers = yes
        cups options = raw
        map to guest = bad user

[Anonymous]
        comment = Anonymous File Server Share
        path = /srv/samba/anonymous
        browseable = yes
        writable = yes
        guest ok = yes
        read only = no
        force user = nobody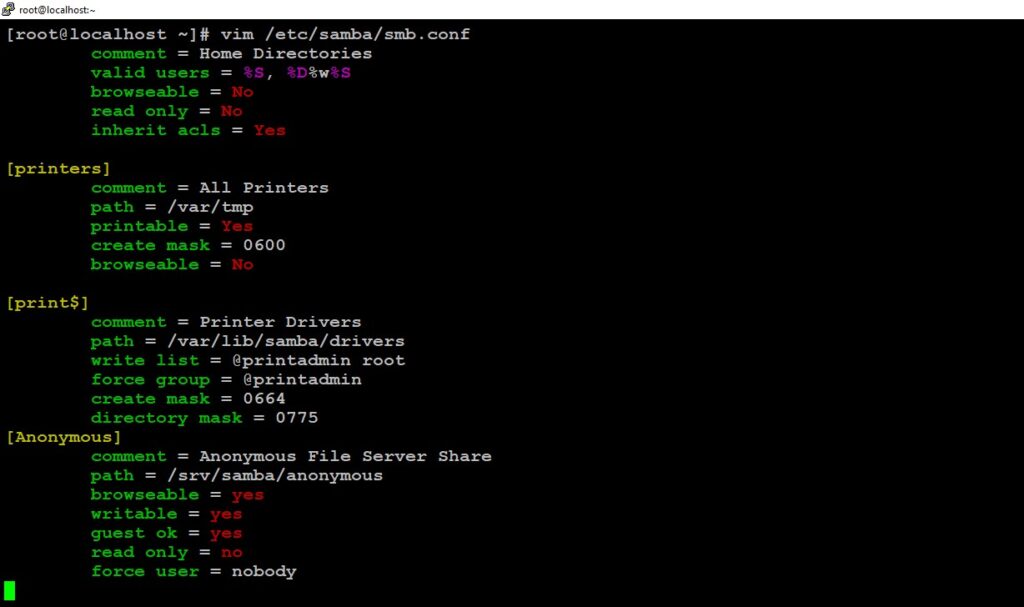
Run the command to verify if the configuration is correct.
# testparm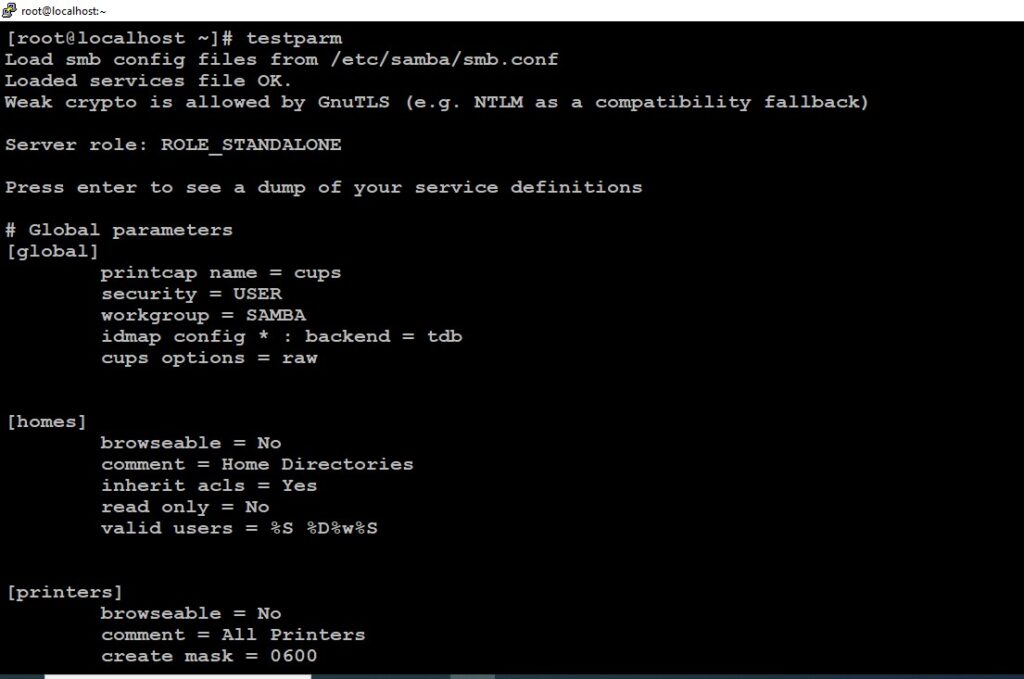
If the Samba configuration is OK, go ahead and restart the samba service.
# systemctl restart smb.service
# systemctl status smb.service
# systemctl enable nmb
# systemctl start nmb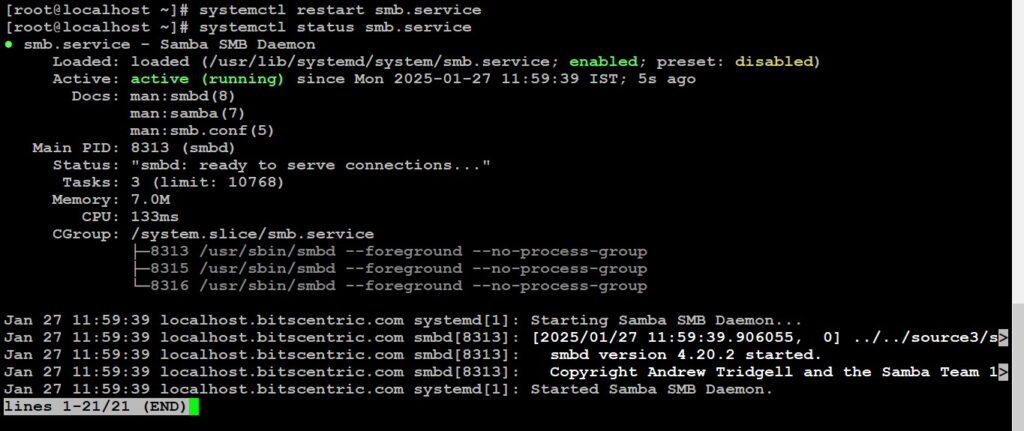
Accessing Samba Share from Windows
we have installed samba and configured our samba share. We are now ready to access it remotely. To do this on a Windows client, press the Windows logo key + R to launch the Run dialog.
# \\192.168.1.5
The following window labeled ‘Public’ will pop up.

Secure Samba Share Directory
First, we will create a new samba user.
# useradd smbuserNext, we will configure a password for the samba user. This is the password that will be used during authentication.
# smbpasswd -a smbuser
Next, we will create a new group for our secure samba share and add the new samba user
# groupadd smbgroup
# usermod -g smbgroup smbuser
Thereafter, create yet another samba share which will be securely accessed.
# mkdir -p /srv/samba/private
# chmod -R 770 /srv/samba/private/
# chown -R root:smbgroup /srv/samba/private/
Once again, access the Samba configuration file.
# vim /etc/samba/smb.conf

[Private]
path = /srv/samba/private
valid users = @smbgroup
guest ok = no
writable = no
browsable = yes
Finally, restart all the samba
# systemctl restart smb.service
# systemctl restart nmb.service
When you access your server this time around, you will notice an additional ‘Private‘ folder. To access the folder, you will be required to authenticate with the Samba user’s credentials. Provide the username and password of the user you created in the previous step and click ‘OK’.


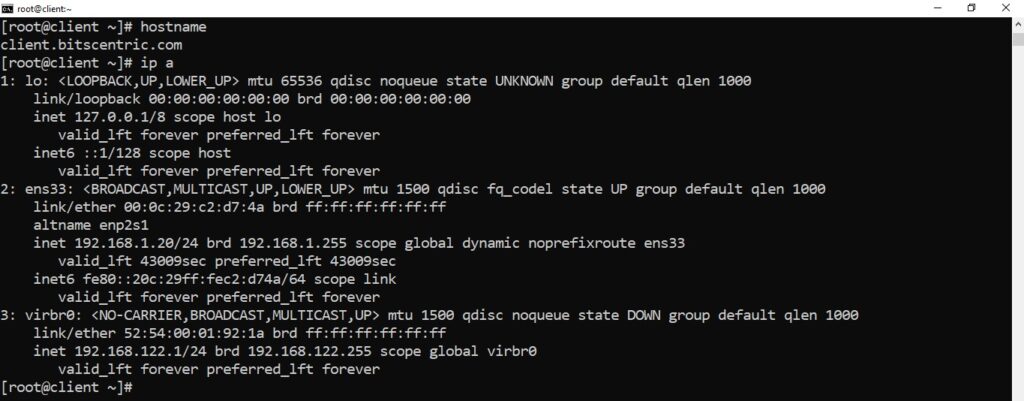
Accessing Samba Share from Linux Client Machine
Now, I am going to take another linux client machine and install samba-client package.
# dnf install samba-client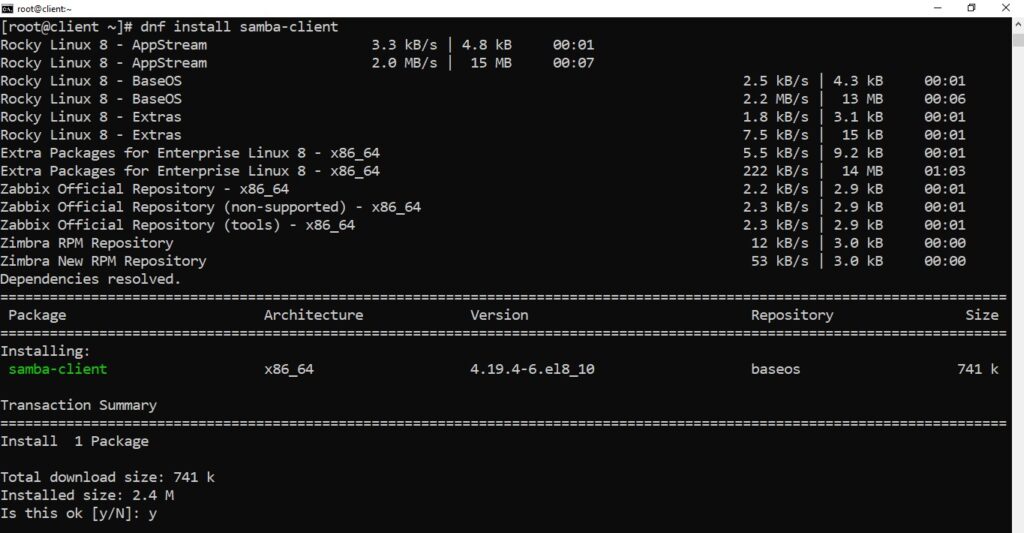
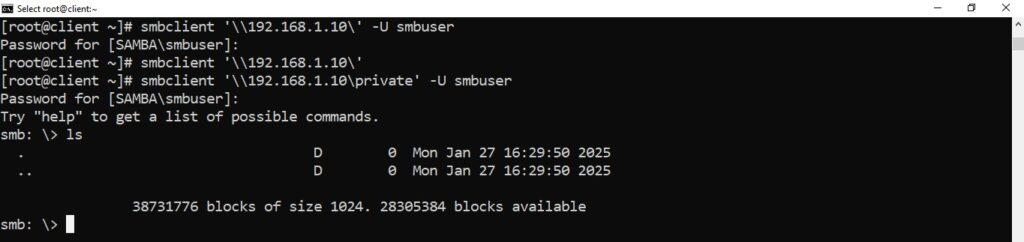
Then use the smbclient command
# smbclient '\\192.168.1.10\private' -U smbuser
Password for [SAMBA\smbuser]:
Try "help" to get a list of possible commands.
smb: \> ls
  .                                   D        0  Mon Jan 27 17:38:32 2025
  ..                                  D        0  Mon Jan 27 17:38:32 2025
  samba-file                          N       15  Mon Jan 27 17:38:32 2025

                38731776 blocks of size 1024. 28303540 blocks available
smb: \> get samba-file
getting file \samba-file of size 15 as samba-file (2.4 KiloBytes/sec) (average 2.4 KiloBytes/sec)
smb: \> exit