How to install Directadmin on RHEL
DirectAdmin is a powerful and user-friendly web hosting control panel for Linux. It helps you manage websites, domains, databases, email accounts, DNS, and more—all from an intuitive interface.
If you’re looking for a fast, efficient, and feature-rich hosting solution for your VPS, DirectAdmin is an excellent choice. In this guide, we’ll walk you through the step-by-step installation of DirectAdmin on Red Hat Enterprise Linux (RHEL).
DirectAdmin is an affordable, user-friendly control panel for Linux-based systems like CentOS, Debian, and RHEL. It simplifies managing reseller accounts, user accounts, and domains—all from a single, intuitive interface.
Why DirectAdmin is a Popular Choice for Server and Website Management?
DirectAdmin is a lightweight and user-friendly control panel that simplifies server and website management for Linux users. Here’s why it stands out:
1. Easy-to-Use Interface
DirectAdmin offers a clean, intuitive interface, making it easy to manage websites, databases, DNS, and FTP accounts without hassle.
2. Strong Security Features
Security is a top priority. DirectAdmin includes firewall management, SSL certificate installation (including Let’s Encrypt), and protection against brute-force attacks to keep your server secure.
3. Full Access to Essential Features
It provides access to SSH, SSL, MySQL, phpMyAdmin, email settings, and more. With three user levels—Admin, Reseller, and User—it ensures complete control over hosting environments.
4. Multi-Hosting Management
Easily manage multiple websites and hosting accounts. Assign resources like bandwidth and disk space to each account with flexible user permissions.
5. DNS and Domain Control
DirectAdmin lets users manage DNS records, add domains, and customize domain settings effortlessly.
6. Database Management
Supporting MySQL and PostgreSQL, DirectAdmin allows users to create, manage, and set database permissions via an intuitive GUI.
7. File & FTP Management
No need for an external FTP client—DirectAdmin’s web-based file manager enables secure file uploads, downloads, and organization.
8. Email Management
Set up email accounts, automatic replies, spam filters, and email forwarding with ease.
9. Scalability & Customization
With support for custom skins, plugins, and scripts, DirectAdmin is flexible and scalable, allowing users to tailor it to their specific needs.
DirectAdmin Use Cases:
- Monitor Resource Usage – Track and manage server resources efficiently.
- Backup & Restore Data – Ensure data safety with easy backups and recovery.
- Manage DNS Records – Configure and update domain settings effortlessly.
- File Management – Upload, edit, and organize files seamlessly.
- Database Management – Handle MySQL databases with ease.
- Email Server Control – Create and manage email accounts securely.
- Website Management – Host and control websites effectively.
- SSL Certificate Handling – Install and renew SSL for security.
- FTP Account Management – Set up and manage FTP access.
- Automate Tasks (Cron Jobs) – Schedule scripts and server tasks.
- PHP Configuration – Customize PHP settings for different domains
Installing Direct Admin on RHEL
Update all the installed packages to the latest available version
# yum updateInstall Required Packages
# yum install wget gcc gcc-c++ flex bison make bind bind-libs bind-utils openssl openssl-devel perl quota libaio libcom_err-devel libcurl-devel gd zlib-devel zip unzip libcap-devel cronie bzip2 cyrus-sasl-devel perl-ExtUtils-Embed autoconf automake libtool which patch mailx bzip2-devel lsof psmisc net-tools ystem-devel libdb-devel perl-DBI perl-Perl4-CoreLibs perl-libwww-perl xfsprogs rsyslog logrotate crontabs file kernel-headers kernel-devel
Download and install DirectAdmin
# wget http://www.directadmin.com/setup.sh
Change the permission of the downloaded startup script to be executable
# chmod +x setup.shRun the Setup Script
# ./setup.shFollow Installation Instructions
The DirectAdmin installation script will guide you through the process. During installation, you’ll need to provide details like your hostname, license ID, and more. Here’s a quick overview of the steps:
- Install required pre-install packages: Type Y.
- Enter your Client ID: Use the ID sent via email.
- Enter your License ID: Input your license ID.
- Enter your Hostname: Provide your hostname.
- Confirm the information: Type Y if everything looks correct.
- Check your network adapter: If eno0 is your network adapter with the license IP, type Y.
- Confirm IP address: Type Y if it matches your license.
- Backup options.conf: Type Y if you want a backup.
- Choose default settings: For Apache 2.4 and PHP 7.4, type Y; for custom settings, type N.
- Find the fastest download mirror: Type Y.
Access to DirectAdmin
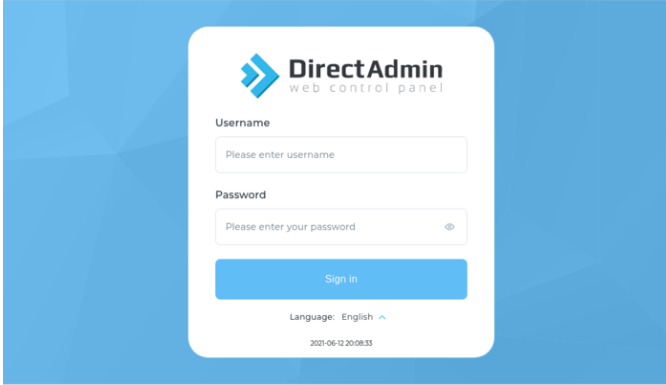
# https://your-server-ip:2222
