
How to Install and Configure HAProxy on RHEL
HAProxy, short for High Availability Proxy, is an open-source software tool designed for load balancing and proxying both TCP and HTTP traffic. Created by Willy Tarreau and written in C, HAProxy stands out for being fast, lightweight, and efficient, with minimal memory and CPU usage. It comes packed with features like SSL support, compression, keep-alive connections, customizable log formats, and header rewriting. Thanks to its performance and reliability, it’s a favorite among major websites like GitHub, Stack Overflow, Reddit, Tumblr, and Twitter. Over the years, HAProxy has earned its reputation as one of the most widely used load balancers and proxy servers around.
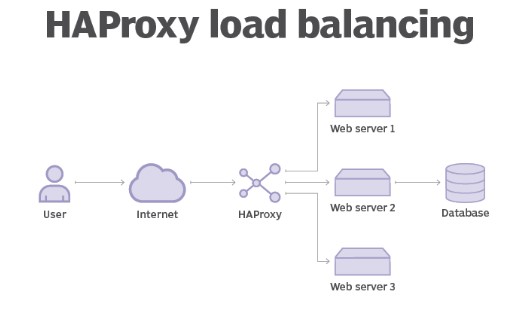
It enhances website and application performance by distributing workloads across multiple backend web servers. This results in reduced response times, increased throughput, and high availability.
Although HAProxy is free and open source, there is also a commercial option called HAProxy Enterprise. It includes a suite of add-ons, professional services, and 24/7 support.
Regardless of which version makes the most sense for your organization, HAProxy provides the following load balancing algorithms:
- Round robin. Web traffic is sequentially distributed across each backend server, with each server assigned a unique number.
- Least connections. Incoming requests are sent to the server with the least number of active connections. This comes in handy when you have a set of servers with varying processing capabilities.
- Least time. Incoming requests are channeled to the server with the fastest response time.
- Source IP hash. The algorithm uses a hash function to map incoming requests from client IPs to a backend server. For instance, requests from the same IP are routed to the same backend server.
- Random with two choices. Two backend servers are selected randomly and requests are sent to either of them by employing the least connections algorithm.
Install HAProxy on RHEL Load Balancer
The next step is to install the HAProxy package on the load balancer node.
First, update the system packages to their latest versions.
# dnf updateHAProxy is available from the default RHEL repositories.
# dnf info haproxy
To install HAProxy
# dnf install haproxy
Configure HAProxy
The next step is to configure HAProxy to serve requests to the backend web servers as expected. But first, make a backup copy of the HAProxy configuration file.
# cd /etc/haproxy/
# cp haproxy.cfg haproxy.cfg-backup
We need to configure the following key sections:
- Front-end settings tospecify the sockets coming from client connections.
- Back-end settings to specify the HAProxy server IP address and the load balancer algorithm.
Front-End Settings
For the front-end settings, navigate to the ‘# Front load balancer’ section and ensure you have the following lines of code. For the ‘bind’ directive, specify the HAProxy IP address.
vim /etc/haproxy/haproxy.cfg

# Front load balancer

frontend load_balancer
    bind 192.168.1.15:80
    option http-server-close
    option forwardfor
    stats uri /haproxy?stats

default_backend   webservers
Back-End Settings
For back-end settings, we will specify ‘roundrobin’ as the load balancing algorithm. Be sure to also specify the back-end servers as shown alongside their hostnames and IP addresses.
vim /etc/haproxy/haproxy.cfg

backend webservers
    mode        http
    balance     roundrobin
    stats       enable
    stats auth  admin:admin
    option httpchk HEAD / HTTP/1.1\r\nHost:\ localhost
    server  apache-web-1  192.168.1.21:80
Configure Rsyslog
The next step is to configure the Rsyslog service so that it can log HAProxy statistics. To do so, access the Rsyslog configuration file.
Add the following lines:
# vim /etc/rsyslog.conf

local2.=info     /var/log/haproxy-access.log
local2.notice    /var/log/haproxy-info.log
Start and Enable HAProxy
# systemctl start haproxy.service
# systemctl enable haproxy.service
# systemctl status haproxy.service
If you have a firewall configured, make sure to allow port 80.
# firewall-cmd --add-port=80/tcp --permanent
# firewall-cmd --reload
Setup Web Servers
# dnf update
# dnf install httpd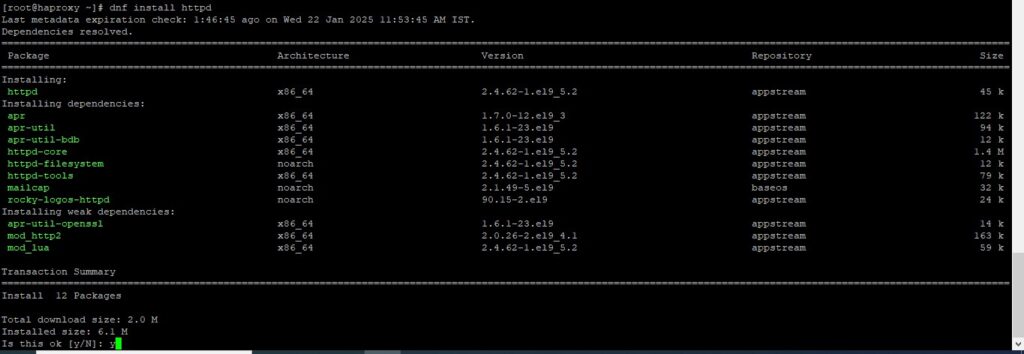
Next, start and enable the Apache service.
# systemctl start httpd
# systemctl enable httpd
# systemctl status httpd
Once installed, create a test website for each web server which will help simulate the round robin load balancing algorithm.
The next step is to configure the webservers and create different index.html files in order to distinguish them from a browser.
For Web Server 1
Switch to the root user and create a sample HTML file.
Test the HAProxy Load Balancing
The last step is to test whether the load balancer is working or not. To do so, visit the load balancer’s IP address
# http://loadbalancer-IP
# http://192.168.1.15/
You can also view the statistics by browsing the following URL
# http://loadbalancer-IP/haproxy?stats
# http://192.168.1.15/haproxy?stats