
How to Deploy Node.js Application on Ubuntu 22.04
Create a Node.js Application
Now that Node.js is installed on your system, it’s time to create a simple application and test it. Start by creating a directory for your Node.js application with the following command:
# mkdir node-app
Next, create a simple hello.js file inside the node-app directory.
# vim node-app/hello.js

const http = require('http');
const hostname = 'localhost';
const port = 3000;

const server = http.createServer((req, res) => {
    res.statusCode = 200;
    res.setHeader('Content-Type', 'text/plain');
    res.end('This my first Node.js Application!\n');
});

server.listen(port, hostname, () => {
    console.log(`Server running at http://${hostname}:${port}/`);
});
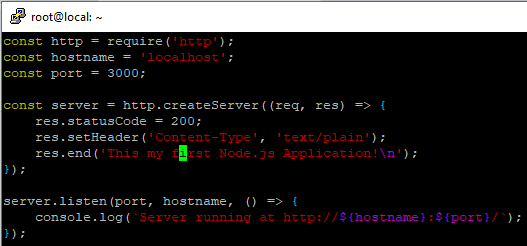
This Node.js application will listen for connections on localhost (your local machine) and port 3000. It will respond with a successful 200 HTTP status code. Since it’s restricted to localhost, only your computer can access the application—remote clients won’t be able to connect.
To test your application.
# node hello.js
Access Node.js Application
Now, open your web browser and access the Node.js application using the URL.
# http://192.168.1.6:3000/ or http://local.bitscentric.com:3000/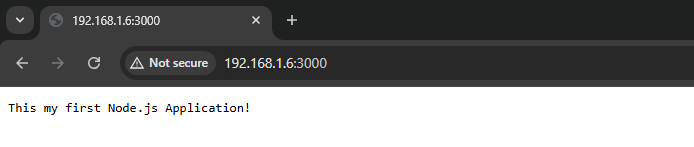
Installing PM2
Next, let’s install PM2, a process manager for Node.js applications. PM2 allows you to run applications in the background as a service, keeping them running even if the server restarts.
Use npm to install the latest version of PM2 on your server.
# npm install pm2@latest -gThe -g option in npm installs the module globally, making it accessible across your entire system, not just within a single project.
# npm install pm2@latest -g
First, let’s use the pm2 start command to run your hello.js application in the background, so it keeps running even after you close the terminal.
# pm2 start hello.js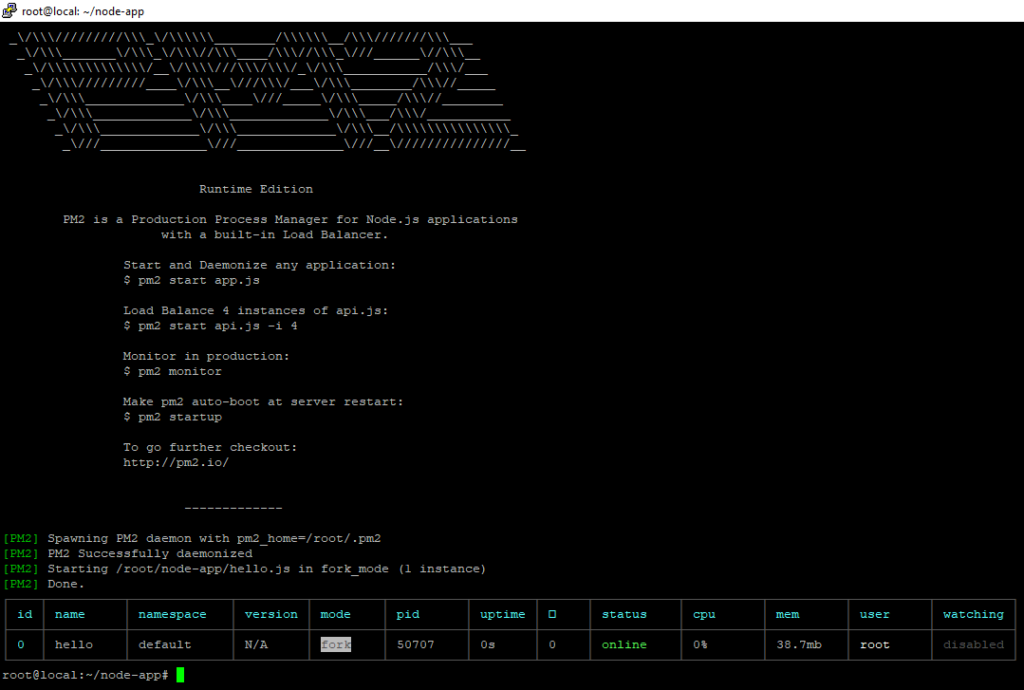
PM2 automatically gives your app a name (from the filename without .js) and a unique ID. It also tracks details like the process ID (PID), status, and memory usage.
Now that your Node.js application is running and managed by PM2.
Let’s set up the reverse proxy.
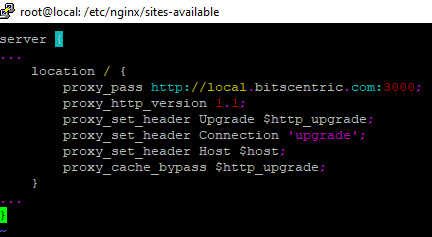
Your app is running locally, but you need a way for users to access it. Let’s set up Nginx as a reverse proxy for this. Open the /etc/nginx/sites-available/example.com file to get started.
# vim /etc/nginx/sites-available/local.bitscentric.com
server {
...
    location / {
        proxy_pass http://local.bitscentric.com:3000;
        proxy_http_version 1.1;
        proxy_set_header Upgrade $http_upgrade;
        proxy_set_header Connection 'upgrade';
        proxy_set_header Host $host;
        proxy_cache_bypass $http_upgrade;
    }
...
}
Make sure you didn’t introduce any syntax errors by typing:
# nginx -tRestart Nginx:
# systemctl restart nginx.service
# systemctl status nginx.service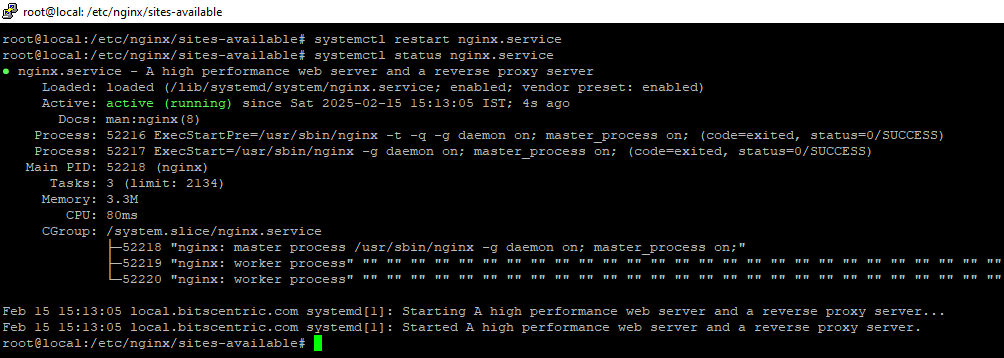
If your Node.js app and Nginx settings are correct, you should now be able to access your app through the Nginx reverse proxy.

Create a Systemd Service File for Node.js Application
In a production environment, it’s best to create a systemd service file to manage your Node.js app with systemctl.
Create a systemd service file for Node.js
# vim /lib/systemd/system/app.service
[Unit]
Description=Node.js Application
After=syslog.target network.target

[Service]
Type=simple
User=root
WorkingDirectory=/root/node-app
Environment=NODE_ENV=production
ExecStart=/usr/bin/node hello.js

Restart=always

[Install]
WantedBy=multi-user.target
Save and close the file when you are finished. Then, reload the systemd daemon.
# systemctl daemon-reload
# systemctl start app.service